Most articles about converting negatives to digital give you a list and call it a day. After scanning 200,000+ negatives at our South Florida studio, here is what no one tells you: the gap between the cheapest method that "works" and the cheapest method that actually preserves your photos is bigger than the price difference. This guide ranks the 8 methods by what experienced scanners think, not what a smartphone app review says.
Last updated: May 2026
At-a-Glance: Methods Ranked by Cost and Quality
The full picture, with costs, resolution, and how each method handles damaged negatives:
Why are Negatives Called Negatives?
Firstly, it's essential to understand that the word "negative" refers to a type of film that captures a photographic image of a scene in reverse. The colors of the image are actually inverted. This film is coated on both sides with an emulsion that contains light-sensitive silver salts. Needless to say, this has very little in common with the creation of the digital pictures we all know nowadays. Back in the day, photography was actually a pretty complex process of exposing chemically reactive materials to light sources.
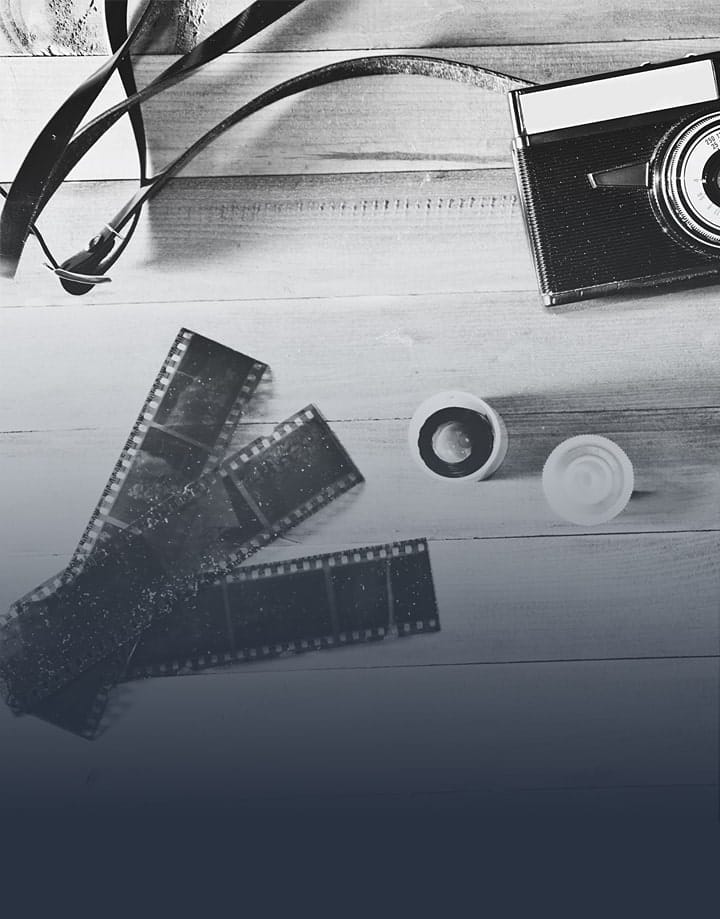
A standard 35mm negative strip with light and color values inverted from the original scene.
The film camera focuses the light reflected off an object through a lens onto the emulsion, and the resulting negative inversion is a result of the compounds in the film reacting to that light. Because the negative looks like a reverse image of the subject, it's called a "negative" rather than a "positive." An example of a positive image would be the final print once it's produced, with the colors inverted back to a true to life form.
How to Scan Negatives? Negative Film to Photo
Now that you know why it's called a negative, let's talk about how to digitize them in different ways. As technology continues to evolve, the digitization of traditional photography is becoming an increasingly popular practice. If you have never heard of "developing" film, that's what needs to be done after the images have been taken in order to prepare the negative for further processing into prints or digital files. Be aware that in the case of negatives you're looking to digitize, the film must be developed first!
WHAT IS DARKROOM DEVELOPING?
When it comes to processing negatives in a dark room environment, precision and attention to detail are key. So is safety. There are lots of chemicals involved in developing film. In today's world, the process of developing film is becoming something of a lost art that only the most dedicated of photographers do. But as recently as the 90s & 2000s, it was actually still being taught in some public schools as an elective. Taking an interest in "old school" photo processing can be very rewarding.
Examining negatives against a light source reveals image detail before scanning.
The process involves carefully exposing the negative images to a light source through an enlarger, developing the image in a series of chemical baths, and carefully drying the final product. The use of specific chemicals and timing is crucial to producing a high-quality image with proper contrast and clarity.
There is a sense of satisfaction that comes with creating something tangible with your own hands, and darkroom photography continues to provide a unique and rewarding experience for those who enjoy the art of film photography. However, in the modern world very few people have access to a dark room, so it's always easier to ask professionals for help. Once your film has been developed, it is ready for the digitizing process. There are a few ways to do it yourself, and of course, we believe we have one of the best negative scanning services in the USA here at Forever Studios.
DIY NEGATIVE SCANNING WITH HIGH QUALITY SCANNER
Negative images require extra care due to their fragile and delicate nature. Start by preparing a working space that is clean, dry, and free of dust. Dust is going to be your number one enemy when it comes to getting high quality scans, especially if it gets on your scanning bed or inside your scanner.
You'll need a digital scanner that can handle negatives (or a slide scanner for slides), a computer with photo editing software, a microfiber cloth, and plastic sheets or containers. Ensure that you handle the negatives with clean and dry hands.
To scan film negatives into digital images, you'll need to use a scanner with a film strip adapter. Again, double check your negatives for dust prior to loading them into the scanning adapter. Any dust on the surface of the negative will show up on the final image. After scanning, be sure to check and edit the image's sharpness, exposure, and color balance using photo editing software.
PROFESSIONAL NEGATIVE DIGITIZATION & SCANNING
This is a complicated process, so if you don't feel like scanning photos yourself or you don't have the necessary equipment (like a dedicated negative or slide scanner), we can help you to scan negatives to digital at Forever Studios. The end result is some amazing high-resolution scans. Obviously negatives from film strips are not the only types of photography work we can handle here.
Types of photo products we process:
Loose Photos
Photo Albums
Negatives
35mm Film
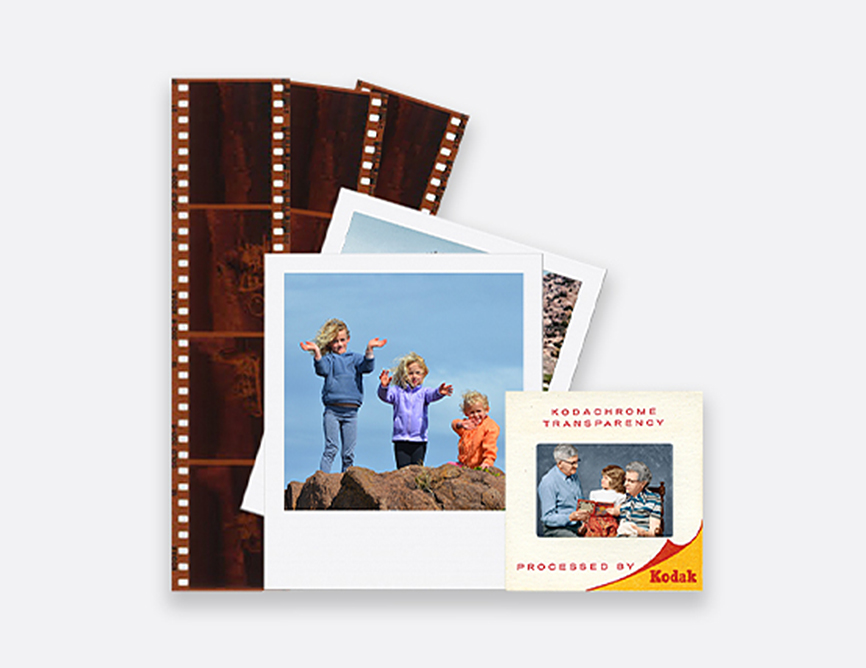
All Sizes of Slides
Disc Negatives
The process of scanning photos at Forever Studios is easy:
Place your negative scanning order online here, or speak to a Forever Studios Concierge.
Pack the original film that you need to scan using either your own packaging, or a Forever Studios Ship Kit. Please be aware that rolls of film must be developed first.
Send your package or ship kit with the photos to be digitized.
At this point, our production team scans your media, and uploads it to your choice of online digital downloads or on a flash drive.
If you have chosen a Forever Cloud Membership, you can view and share your photos from any device using Forever Cloud.
For more info, read How it Works.
Have 35mm slides? No problem we can scan those too. Learn more about slide scanning here.
Once your order is complete, we'll send back all of your originals, as well as any photo discs, or USB thumb drives you have ordered. But these days, we highly recommend checking out our Forever Cloud Memberships, which are always going to be the best way to store and share your newly digitized media. We also offer a huge range of photo prints and photo art that you should check out in our Forever Art Collections!
THE FOREVER STUDIOS SHIP KIT. YOUR SUPER-EFFECTIVE OPTION
With our 3-way shipping kit, you can quickly and safely send us your photos, slides or negatives to scan. without having to do any of the legwork yourself.
The Forever Studios Ship Kit includes everything you need to safely mail in your negatives.
Our conversion services take care of the entire process for you, right from providing a secure shipping box at your doorstep with all necessary items for shipment, to priority shipping and tracking information.
Your photos will be shipped in a crush-proof box with pre-filled labels provided for easy recognition and delivery. All these features make this the safest and fastest way to ship your precious memories to us for scanning! but there are a couple more DIY options you can consider as well.
USING A DSLR CAMERA
One way to digitize negatives is by using a digital photo camera. This method involves placing the negative on a light box and taking a photograph of it using a digital camera.
It is crucial to ensure that the camera is positioned correctly and that the negative is in focus to achieve the best results. Additionally, adjusting the camera settings, such as exposure and ISO, can help to capture the details and enhance the image quality.
Overall, digitizing negatives with a digital photo camera provides a simple and efficient way to preserve images for future generations if you have the proper equipment and knowledge.
STANDARD FLATBED SCANNER
Scanning negatives using a regular flatbed scanner is probably going to yield the best result for the novice looking to do a DIY process. The digital images that are captured using this kind of device are usually pretty great, and it's not incredibly difficult to get moderately consistent results. The problem is that a good flatbed scanner isn't the cheapest thing out there, and the process is pretty time consuming.
Begin by ensuring that your scanner is properly calibrated and that the negatives and scanner bed are clean and free of dust or debris.
Next, place the negative on the glass scanner bed and adjust your settings to accommodate for the negative's size and resolution. Then hit the capture button.
A basic home scanning setup with a flatbed scanner and photo editing software.
Finally, use a photo editing software to adjust the brightness, contrast, and color balance of the scanned image.
With a little patience and practice, you'll soon be able to expertly scan all of your old film negatives with ease.
SMARTPHONE
Scanning negatives using a smartphone is a new and novel way of doing it, and with the right tools and techniques, it can be a simple and efficient process. To begin, start by installing a scanning app designed specifically for negatives.
Once installed, place the negative on a flat surface with a white background and position the smartphone camera over it, ensuring that the lens is parallel to the negative.
Adjust the exposure settings and focus, and then take the photo. After taking the photo, import it into a photo editing software, invert the colors, and then adjust them to your liking. With these steps, you can produce high-quality scans of your negatives right from your smartphone, however, it's almost impossible to get accurate results without photo editing experience.
If you only have a couple of negatives to work on, this can be an option, but it is not going to yield anywhere near the best possible results.
What If My Negatives are Damaged? Can I Restore Them?
Have you found your photo negatives damaged? Don't worry! At Forever Studios, we can restore photos even from the most damaged negatives. We actually have an entire team of photo restoration experts on staff, and they work on old photo restorations for people just like you every day.
Our experienced old photo restoration experts use cutting-edge technology to bring back your most precious memories in vivid detail. It's part art, and part science. The first stage of doing a restoration is AI assisted, helping to get rid of many of the basic defects. From there, our artists can reconstruct entire sections of an image by hand.
Professional photo restoration can recover remarkable detail from damaged negatives and prints.
We're very proud of being able to offer this service to people for an affordable price, and we were probably the first in the USA to do so. So if you have damaged negatives or photos, get in touch today and let us help you restore your treasured memories to their original condition. We'll be happy to give you a free evaluation.
MORE INFORMATION ON FOREVER STUDIOS PHOTO RESTORATION
At Forever Studios, our world-class team is trained to deliver excellent quality AND do so in an almost unbelievable time frame.
We guarantee that you will receive superior quality images with great clarity and detail - all with a quick turnaround time (usually it takes from 1 to 3 days). From there, our robust revision process guarantees a great outcome. You are allowed unlimited revisions on every project, working directly with our artists. It's a product loved all over the country.
So if you have a negative scanning project done with us here, it's almost trivially easy to then get any of the digital images restored by our artists. Especially if you have Forever Cloud
Are Negatives Worth Keeping After Scanning?
Storing negatives is the next crucial step. Keep them away from humidity, heat, and direct sunlight, as it can damage the film. You can choose to store them in plastic sheets or containers that are explicitly designed for negatives.
Negatives preserve the original image data and can produce higher quality scans than prints.
Label each container with the date and the corresponding negative number for easy identification. You can also make digital backups of your scanned negatives, which you should store in a separate location, potentially on an external hard drive or the like.
If you don't have the space to store negatives, it's better to digitize them and recycle the negatives. Digital photos offer an easy way to preserve your memories without taking up physical space. If you have a project done with us here and would like to have your originals recycled, we actually offer that as a service.
Recycle Your Negatives the Right Way
Once you've scanned your negatives, you can share them online or get prints or Forever Art of them easily. And if you have a Forever Cloud Membership, you don't really need to worry about safeguarding your images. Recycling old film negatives will help keep our environment clean and reduce clutter in our homes.
1. Donate Your Negatives: You can donate your old negatives to a local library, historical society, university, or other academic institution. Not only will these organizations be able to scan the film and preserve its important memories, but they can also use the negatives for research or educational purposes.
2. Recycle at a Recycling Center: Negatives are made of plastic and can often be recycled. However, before you do this, make sure that the negatives have been scanned and saved digitally so that their memories won't be lost.
3. Recycle with Your Forever Studios Project: As discussed above, you can elect to recycle your originals with us.
DID YOU GET THE ANSWERS YOU WERE LOOKING FOR?
Obviously, as a business, we love working on any negative scanning project that comes through our doors. All of us here at Forever Studios were enthusiasts, hobbyists, and industry professionals before we ever worked here. But that's why we also care about the work of preserving history in general. We strongly encourage learning things on your own so that the great historical art of photography lives on through new enthusiasts. And it's also why you can trust us with any of your media digitizing needs. If you're interested in getting your negatives digitized, we're happy to discuss a project with you! Also make sure to check out our other media digitization offerings: Tape Digitizing, Audio Digitizing, & Film Digitizing.
How to Prepare Your Negatives Before Scanning
Handle negatives by the edges only, and wear clean cotton or nitrile gloves if you have them. Use a soft, lint-free cloth or compressed air to remove dust from both sides of the strip before placing it on the scanner bed. Even a single speck will show up as a dark spot on the final image.
Organize your strips by date or subject before you start. Label each sleeve or container so you can match the digital files to the originals later. If any negatives are curled or stuck together, let them sit flat in a cool, dry room for a few hours rather than forcing them apart.
A few minutes of preparation can make the difference between a sharp scan and a wasted effort.
What AI Photo Apps Get Wrong About Negatives
AI photo tools have exploded in the last two years, and several of them claim to "convert negatives to digital" automatically. They work well on simple cases. Here are the specific failure modes we see when customers send us photos that started life as an AI-app scan:
1. Color cast in slide film versus negative film. Slide film (Ektachrome, Kodachrome) and negative film (Kodacolor, Fujicolor) need different inversion math. Most free apps assume Kodacolor. Run an Ektachrome slide through DigiKam's auto-invert and you get a magenta cast you will never undo without manual correction.
2. Grain interpretation. The grain in film is part of what makes it look like film. AI smoothing destroys it. A 1965 Tri-X negative scanned with auto AI enhancement comes out looking like a 2020 digital photo with a vintage filter. The texture that gave the photo its character is gone.
3. Damage from previously failed amateur scans. When someone scans a negative with a cheap USB gadget and then runs it through an AI restorer, the AI tries to "fix" the gadget's lens distortion. The result is a stretched, warped photo that the original was never going to produce. We see this constantly. The fix is to start over with the original negative.
4. Multi-pass exposure stacking for high-contrast negatives. Some negatives have dynamic range that exceeds what a single scan pass can capture. Professional scanners do 2 to 4 exposure passes and merge them, the same way HDR works for digital cameras. AI apps cannot do this. They see a single-exposure result and try to "lift the shadows," which introduces noise that was not there in the original negative.
5. Backlight calibration. The light source behind a negative changes how the colors invert. A pro setup uses a calibrated RGB lightbox at known color temperature. A phone scan uses whatever the room lighting is. AI apps cannot guess what the room lighting was. The colors come out wrong, and the AI tries to "correct" them in ways that drift further from what the photo originally looked like.
None of this means AI tools are useless. For simple negatives in good condition, free apps produce results that are absolutely fine for sharing on Instagram. For anything you want to preserve as the actual image your grandfather took, the rules above apply.
Frequently Asked Questions
How much does it cost to convert negatives to digital?
Costs range from free (using a phone camera and a free negative-inversion app) to about $2 per negative for professional scanning. A mid-range flatbed scanner like the Epson V600 costs around $300 and is the best DIY option. Professional services typically charge $0.50 to $2 per negative depending on volume, resolution, and whether damage repair is included.
Can I scan negatives with my phone?
Yes, and the results are surprisingly decent for casual use. You need a backlight source (a tablet or laptop screen displaying a white page works), a free inversion app like DigiKam or FilmLab, and a steady hand. The output is around 8 to 12 megapixels, which is fine for sharing but not for archiving. Phone scans cannot match the resolution or color accuracy of a flatbed scanner.
What resolution should I scan negatives at?
At minimum 2400 DPI for 35mm negatives if you only want to view them on screen. For archival quality or for making prints, scan at 4000 DPI or higher. Professional services typically scan at 4000 to 6400 DPI. Going beyond 6400 DPI on consumer scanners is mostly marketing, because the optical resolution of the lens caps out around that point.
Should I scan negatives myself or have them done professionally?
If you have under 50 negatives in good condition, scan them yourself with an Epson V600. If you have hundreds, or if any are damaged, or if they are negatives of irreplaceable family events, send them to a professional service. The cost difference disappears when you factor in your time. A pro can scan 500 negatives in the time it takes you to learn your scanner.
What's the difference between scanning slides and negatives?
The inversion math is completely different. Slides (also called positives or transparencies) are scanned as-is because they already show the final image. Negatives need to be inverted, which means flipping the colors and applying a specific orange-mask correction that varies by film type. Most consumer scanners handle both with a film holder, but the software settings must match what kind of film you have.
Why are my scanned negatives blurry?
Three usual causes. First, focus: many scanners do not auto-focus on the negative plane and need manual adjustment. Second, vibration: any movement during the scan blurs the result. Third, the negative is not flat. Negatives curl over time and need to be held flat in a holder, not just laid on the glass.
Can damaged negatives be scanned?
Yes. Even severely damaged negatives can usually be scanned, though the quality depends on the type of damage. Scratches and dust can be cleaned. Mold can be carefully removed before scanning. Brittle or cracked negatives need to be handled by a professional with proper film cleaning chemistry. Stuck-together negatives (a common problem after water damage) can sometimes be separated using controlled humidity. AI tools cannot do any of this.
Are old negatives worth keeping after scanning?
Yes. A high-quality scan is durable, but the original negative is the master archive. If your scan is ever lost or corrupted, the negative can be rescanned. If technology improves and we can extract more detail from negatives in 10 years (which we expect), only the original allows that. Store the originals in archival sleeves in a cool, dry environment.
How long does it take to scan a roll of negatives?
A single 36-exposure roll of 35mm negatives takes about 45 minutes to scan on an Epson V600 at 2400 DPI. Higher resolutions and dust removal can push it to 90 minutes. Professional services with batch scanners can do dozens of rolls per hour, which is why per-negative pricing is competitive.
What file format should scanned negatives be saved in?
TIFF for archival, JPEG for sharing. TIFF is lossless, which means you can re-edit the file later without quality degradation. JPEG loses a small amount of quality every time it is saved. Most professional services deliver both formats: a TIFF master for archival, and JPEGs sized for screen and print.